Finishing Strong on a Restoration Project

By Mark Cornelius, Keith Gangitano, and Michael Pinto
Who wants to run the ball the length of the football field only to fall inches from the goal line? In comparison, building a brilliantly designed and executed containment, followed by practical remediation work, only to “fumble” inches from successful post clearance is equally tragic. As the saying goes, it is snatching defeat from the jaws of victory.
This article will provide time-tested guidance on completing restoration projects and ensuring poor demobilization processes do not sabotage the project.
Remember: The ‘why’ guides the ‘what’
Projects needing temporary barriers constitute a completely different class of work than those activities not needing containments. Temporary containments segregate structures to keep “bad stuff” in a defined space.
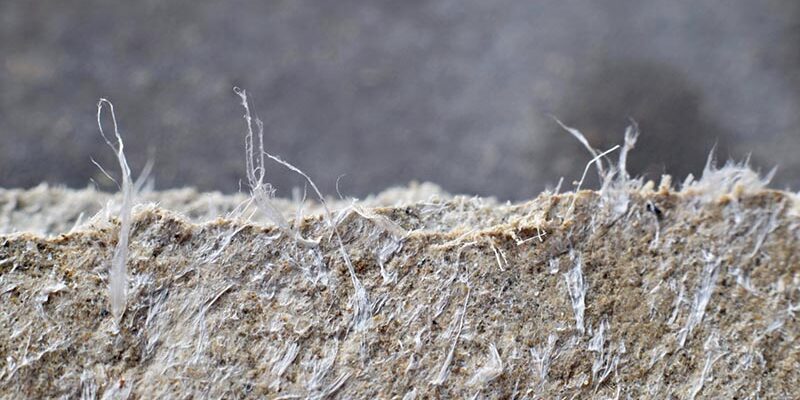
Whether the debris/contaminants are drywall dust, mold spores, asbestos fibers, lead paint chips, or other contaminants likely to be airborne, temporary containments prevent cross-contamination of previously unaffected areas.
Dealing with the fall-out
The reality is some debris will go airborne during any demolition and cleaning procedures. Eventually, all particles will settle onto surfaces. The best practice is to minimize the amounts of particulates by careful, well-considered handling of items and using tools that collect dust at the point of creation (e.g., cutting tools designed to connect to a HEPA vacuum). The most effective approach is control and direct versus chase and capture.
Small airborne contaminants are often removed by adding negative pressure to the contained area utilizing air filtration devices (AFDs). Supplemental procedures also aggregate small dust pieces into heavier clumps that settle quickly. This can be done electronically using ionizers or physically by fogging liquids that attract the dust onto the droplets.
Yet to be discussed is what to do with the exhaust of the AFD. Hundreds of job site “brag” photos are posted of projects where the exhaust of the AFD is terminated within the structure on the “clean” side of the temporary containment. The proper procedure is to exhaust the AFD to the outside of the building, if possible. Why?
Is your AFD functioning correctly? Most contractors never test the functionality of the AFD. If it is not filtering appropriately, you did more than stumble and fall before the end zone. This fundamental error is akin to running in the wrong direction and scoring for the other team. Don’t exhaust the fallout of your containment into the unaffected structure.
Another critical component is an exit strategy. How do you exit the work area with debris, and tools, or go home at the end of the work shift? A piece of plastic over the doorway with a zipper qualifies as a temporary barrier until you unzip the zipper. At that moment, you often will lose negative air, and the weight of the particles floating in the air will cause them to fall out of the contaminated room. Even if dust does not fall out, you are contaminated and will take particles with you as you traverse the building. To avoid this, you must have a decontamination chamber on most projects.
Cleanup is a process
The remaining structure and air must be cleaned with the demolition complete and debris removed. The solution to the pollution is dilution. Having clean air enter the containment area from a known clean air source will ideally direct particulates across the containment area to the intake of the AFD, where the air will be filtered and then exhausted outside the building. AFDs can also be placed in the work area with thoughtful plans regarding redirecting the exhausted air utilizing a diffuser tail. A diffuser tail is a lay-flat tubing attached to the exhaust, tied at the far end with slits or holes cut along the length, which exhausts air more strategically and efficiently.
Cleaning the air is then matched with cleaning the surfaces. Remember, not just horizontal surfaces within the containment must be cleaned of particulates. Walls and vertical surfaces must be addressed, including the surface or containment. Contaminants left on walls will contaminate the air and vice versa.
How to check your work
Post-remediation verification (PRV) often involves visual inspections and some form of sampling. Before scheduling PRV, do a thorough visual inspection. A helpful technique is using both white and dark-colored gloves. The different-colored gloves wiped across various surfaces will provide physical evidence that the surfaces need additional cleaning.
Another inspection technique is to shine the beam of an LED flashlight across the surface, rather than pointing it perpendicular to the area being examined. The light shining along the length can highlight the dust by showing irregularities and shadows. This method can provide visual evidence that a surface still needs cleaning.
You are ready for sampling once you pass your internal quality control inspection. If sampling is part of the protocol, the temporary containment barriers (and negative pressure if utilized) must be maintained until after the sample results have been received. Too often, negative air is shut down or containment is demobilized before obtaining testing results.
When lab results indicate the air inside the work zone is still contaminated, any savings that might have been realized by having the barriers taken down while the crew was still on-site will be completely lost. The additional cost of having to send people back later to remove the containment pales in comparison to the cost of additional cleaning, not to mention a damaged reputation and potential liability.
What sampling?
Microscopic particles cannot be identified by visual inspection. It is true that residual dust particles clearly indicate that the air or surfaces are not clean, but only sampling can determine the concentration of the different possible contaminants that might remain.
What samples should be taken? An individual with an extensive background in remediation techniques and sampling strategies would be the best person to answer that question. Sampling should be appropriate to the work area. General dust, like sawdust or drywall sanding dust, can be sampled with electronic particle counters, providing real-time numerical data. Following all laws and ordinances, asbestos, lead, mold, silica, and other hazardous items require sampling methods by people properly qualified to identify the substance. Asbestos sampling techniques, for example, can provide a distinction between dust particles and fibers, down to the detail of what type of asbestos it is or if it is merely paper residue or even fiberglass.
Combining aggressive visual/wipe inspection and appropriate air sampling confirms that the properly cleaned containment barriers are ready to be removed without putting adjacent areas at risk of work-related contamination.
Finish strong
A good goal is to have no dust/contaminants in the work area after remediation. Even though zero can be difficult or even impossible to achieve economically, it is still fantastic to aim for such a goal. There’s a saying: Shoot for the moon; even if you miss, you’ll land among the stars. This approach is critical when the contaminant is hazardous (e.g., methamphetamine or fentanyl). All residual dust must be cleaned to a predetermined acceptable level in those situations.
One of the keys to finishing strong is knowing the playbook. You must understand what the post-clearance criteria will be.
The effort put into designing, constructing, and working correctly inside temporary containments is only well spent if the closeout, final cleaning, and teardown are completed correctly. Do not become complacent and drop the ball at the end; you will never get into trouble for finishing too strong!
Let’s end at the beginning
Professionals do not practice during the game; they perform. They practice on the practice field. Learn how to build containments properly in classes. Many classes are provided by the National Organization of Remediators and Microbial Inspectors (NORMI), as well as the Institute of Inspection Cleaning and Restoration Certification (IICRC) via its approved Applied Microbial Remediation Technician (AMRT) courses.
Practice in your office and warehouse, figure out what went right and wrong by critical debriefings, and learn how to repeat it or delete it. Make it better and keep mistakes from happening again in an actual situation so that you perform at the top of your game at the clients’ property. Study the playbook (for mold remediation, it is the ANSI IICRC S520), run the drills, practice how you play, and win the day!
Mark Cornelius has been in the restoration industry for more than 38 years. He is president of Disaster
Recovery Industries Inc. and owns Emergency Mitigation Technician Academy.
Keith Gangitano co-founded Airwalls by Zeppelin, a company with restoration containment solutions.
Michael Pinto serves as the CEO of Wonder Makers Environmental and has more than 45 years of experience in the industry.


